
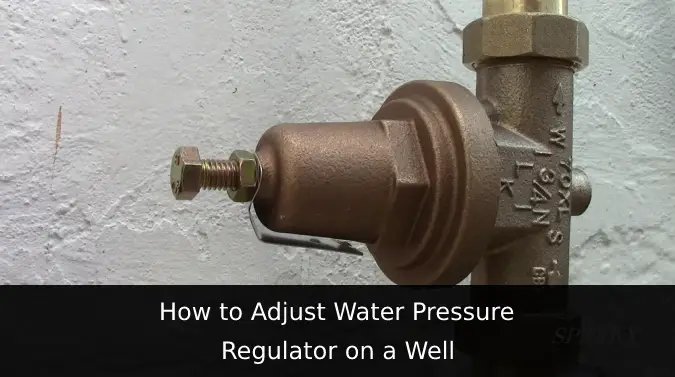
Pressure-Reducing Valve Diagnosis and Replacement: A Homeowner’s Guide to Taming the Water Hammer
 0
0
 0
0
You know that annoying hissing sound from the basement? Or maybe it’s the shower that suddenly turns into a scalding jet when someone flushes the toilet. Honestly, most people ignore these signs until something dramatic happens — like a pipe bursting behind a wall. But here’s the deal: a failing pressure-reducing valve (PRV) is often the silent culprit.
Think of a PRV as the bouncer at a club. It takes the high-pressure water from the city main — sometimes 100 psi or more — and calmly reduces it to a safe, consistent level for your home’s plumbing, usually around 50 to 60 psi. Without it, your pipes, water heater, and washing machine valves are all screaming for mercy. And when that bouncer gets lazy or drunk on mineral deposits… well, things get messy.
First Things First: What Exactly Does a PRV Do?
Let’s get technical for just a second — but not too technical. The pressure-reducing valve is a mechanical device, usually brass, with a spring-loaded diaphragm inside. Water flows in at high pressure, pushes against that diaphragm, and the spring adjusts to keep the outgoing pressure steady. It’s a balancing act, really. A good one will hold your home’s pressure within a few psi, no matter what the city is doing on their end.
But here’s the thing most people don’t realize: these valves aren’t immortal. They have moving parts, and moving parts wear out. Hard water, sediment, and even just the constant vibration of water flow take a toll. I’ve seen valves that are 20 years old still working fine, and I’ve seen five-year-old valves that are completely shot. It all depends on your water quality and how often the valve actually cycles.
Six Signs Your Pressure-Reducing Valve Is Dying
So, how do you know if your PRV is on its last legs? Well, you don’t need a crystal ball, but you do need to pay attention. Here are the most common symptoms, and honestly, they often show up together.
- Water pressure that’s all over the place. One day the shower feels like a gentle rain, the next day it’s a power washer. That inconsistency is a classic sign of a failing diaphragm.
- That persistent hammering noise. You know, the loud bang when you shut off a faucet quickly. A PRV that’s not absorbing pressure properly lets the water slam back against the pipes.
- Your water bill is creeping up. High pressure means more water flowing through every time you open a tap. It might not seem like much, but over a month, it adds up.
- Visible leaks around the valve itself. If you see water stains, mineral crust, or actual dripping around the adjustment screw, that’s a direct sign of internal failure.
- The pressure gauge test fails. This is the definitive diagnostic. You attach a pressure gauge to an outdoor spigot or laundry faucet, and check the static pressure. Then you check it again with a faucet running. If the pressure spikes above 80 psi or fluctuates wildly, your PRV is toast.
- Your water heater is making strange noises. High incoming pressure can stress the tank’s internal components, leading to premature wear and rumbling sounds.
Now, a quick word of caution: some of these symptoms can also point to a failing expansion tank on your water heater, or even a city-side pressure issue. But if you’ve ruled those out, the PRV is the prime suspect.
Before You Swap It Out: The Diagnostic Checklist
Alright, so you’re fairly convinced the PRV is the problem. But let’s be methodical here. Replacing a PRV isn’t hard, but diagnosing it wrong means you just wasted $60 and an afternoon. Here’s a step-by-step approach that I’ve used more times than I can count.
Step 1: Get a Reliable Pressure Gauge
You can pick one up at any hardware store for about $10. It screws right onto a hose bib. Make sure no water is running in the house, then read the gauge. Normal is between 40 and 60 psi. If it’s over 75, you’ve got a problem.
Step 2: Test Dynamic Pressure
Now, turn on a faucet somewhere else in the house — just a little bit, like a trickle. Watch the gauge. A healthy PRV will hold the pressure steady, maybe drop by 2 or 3 psi. A failing one will either spike or drop significantly. That’s your smoking gun.
Step 3: Check the Adjustment Screw
On top of the valve, there’s an adjustment screw with a locknut. Sometimes, the valve isn’t broken — it’s just out of adjustment. Loosen the locknut, turn the screw clockwise to increase pressure, counterclockwise to decrease. Then re-test. If you can get it into the 50-60 psi range and it holds, you just saved yourself a replacement. But honestly, if it’s out of adjustment, it’s usually a sign that the internal spring is weakening.
Step 4: Look for Leaks — But Not the Obvious Ones
Feel around the base of the valve, but also check the union fittings on either side. Sometimes the valve is fine, but the fittings have corroded. A little pipe dope and a wrench might fix that. Don’t skip this step — I’ve seen people replace a perfectly good valve because they didn’t bother to check the connections.
Choosing the Right Replacement Valve
Okay, so you’ve confirmed the diagnosis. The valve needs to go. But wait — don’t just grab any brass thing off the shelf. There are a few things to consider.
First, check your pipe size. Most residential PRVs are 3/4-inch, but some older homes have 1/2-inch or even 1-inch. Measure the inside diameter of the pipe, not the outside. Second, consider the flow rate. If you have a large family or a sprinkler system, you might need a valve with a higher flow capacity (measured in gallons per minute, or GPM). A standard 3/4-inch valve handles about 20-25 GPM, which is plenty for most homes.
Third, and this is a big one — check your local plumbing code. Some municipalities require a specific type of PRV, or they might require a thermal expansion tank to be installed alongside it. Don’t skip this. It’s a $20 tank that saves you from a $500 water heater replacement later.
| Valve Type | Best For | Approx. Cost |
|---|---|---|
| Standard Brass PRV | Most homes, basic water conditions | $40 – $70 |
| Stainless Steel PRV | Homes with aggressive/corrosive water | $80 – $120 |
| Adjustable with Gauge | DIYers who want precise control | $60 – $90 |
| High-Flow PRV (1 inch) | Large homes, irrigation systems | $100 – $150 |
Also, pay attention to the arrow on the valve body. It indicates flow direction. Installing it backwards is… well, let’s just say you’ll know immediately because it won’t work at all.
The Replacement Process: A Step-by-Step Walkthrough
Now for the main event. If you’re reasonably handy — you’ve changed a faucet or fixed a toilet — you can do this. It’s not hard, but it does require patience and a few specific tools. Let’s break it down.
Tools You’ll Need
- Adjustable wrenches (two of them — trust me, you need two)
- Pipe wrenches for stubborn fittings
- Teflon tape (the pink or yellow kind for water lines)
- Pipe joint compound (optional, but helpful)
- A bucket and old towels
- Pressure gauge (to verify your work)
- Thread sealant or pipe dope
Step 1: Shut Off the Water
This sounds obvious, but you’d be surprised. Find the main water shutoff valve — usually near where the water line enters the house, often next to the water meter. Turn it clockwise until it stops. Then open a faucet somewhere (the lowest one you can find) to drain the remaining water from the lines. This relieves pressure and prevents a flood when you crack the fittings.
Step 2: Relieve the Pressure
Even after draining, there’s sometimes residual pressure in the line. Open the faucet you used to drain, and also open a hot water tap upstairs. Let everything sit for a few minutes. You want zero pressure on that valve.
Step 3: Remove the Old Valve
Here’s where the two wrenches come in. You’ll use one to hold the pipe steady and the other to loosen the nut on the valve. If the valve is threaded, turn it counterclockwise. If it’s a union fitting, you’ll need to loosen the union nut first. Be prepared for some resistance — mineral deposits love to weld these things together. A little penetrating oil (like WD-40) helps, but give it 15 minutes to soak in.
Once it’s loose, pull it straight off. If it’s soldered in place (older homes sometimes have this), you’ll need to cut the pipe with a tubing cutter and use a fitting to adapt. That’s a bit more advanced, so if you encounter that, you might want to call a pro.
Step 4: Clean the Threads
Use a wire brush or some emery cloth to clean off the old thread sealant and any corrosion. You want a smooth surface for the new valve. If the threads are damaged, you’ll need to repair them with a thread chaser — or call a plumber.
Step 5: Install the New Valve
Wrap Teflon tape around the male threads of the pipe — about 6 to 7 wraps, going in the direction of the threads. Then, screw the


